
SIMS-produced maps can maintain a consistent aesthetic by taking advantage of standardized color palettes. These files offer quick access to proper colors when creating maps in QGIS. A GPL file is a color palette created for use in QGIS as well as image editing software. This guide will walk you through how to download the standard SIMS color palette in .gpl format and import it into QGIS either a single project or for access across all of your projects.
Importing into a single project
- Download the color palette file
- Open QGIS (tested with v. 3.30.0)
- From the menu toolbar, select Project > Properties (ctrl + shift + p)
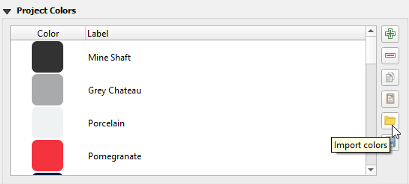
- Under the Styles tab, find the Project Colors section and select the Import Colors icon (yellow folder – see screenshot A)
- Use the file browser to select the GPL file you saved in step 1 and click Open
- The imported colors should be listed under Project Colors
- Click Apply or OK to finish
When editing styles, the imported colors will now show up in the Project colors section of the color picker dialog. For additional documentation from the QGIS knowledge base on using styles, see this article.
Importing for access across any project
- Download the color palette file
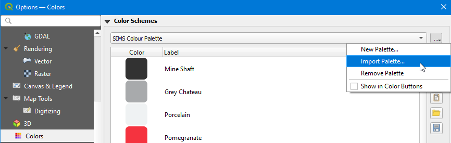
- From the menu toolbar open Settings > Options
- Open the Colors tab and click the ellipsis (
...) button in the top right (see screenshot B) - Click OK again to close the Options dialog
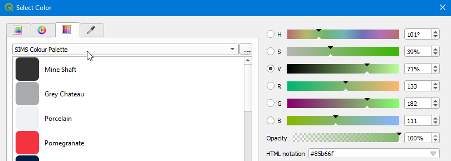
- The custom color palette will show up in the Color Swatches tab of the expanded color picker dialog (see screenshot C)
For additional documentation from the QGIS knowledge base on using styles, see this article.