
Regular users with basic access to the SIMS Portal have control over their profile, as well certain functions like uploading new products. Administrators, on the other hand, have additional permissions that allow them to edit data, approve new users, assign special edition badges, and more.
Accessing the Admin Portal
If you are listed as an administrator, you will have an additional link in your top navigation ribbon labeled Admin Portal. If you expect to see this but do not, please reach out to another administrator.
Admin Portal Functions
Once you access the admin area, you will see several tabs that allow for quick actions:
Manage Support Profiles
There are six profiles that users can qualify for:
- Geospatial
- Information Design
- Data Collection & Survey Design
- Data Transformation & Analysis
- Web Visualization
- SIMS Remote Coordination
Each of these profiles has four tiers associated with them to distinguish between levels of expertise. SIMS members that manage a roster of staff and/or volunteers that support SIMS activations are in charge of managing this data. To make an update, reference the table below the form which summarizes each user’s profiles (you can find a specific member using the search field). If you assign a member a profile at a tier they already have, you will get an error. If you assign a profile tier that is lower than what they currently have, not change will occur—if you want to downgrade a user’s tier, do so in the admin backend by deleting the object.
Assign Badges
Most badges are designed to be assigned by SIMS Remote Coordinators during a response. Others can be automatically assigned by the Portal when certain pre-defined conditions are met. But some badges can only be assigned by administrators, including “Special Edition” badges.
An error will be returned if an administrator tries to assign someone a badge they already have. To remove a badge from a user, use the admin backend.
Approve Pending Members
When new users register for the Portal, their account is set to a “Pending” status which prevents them from certain functionality. This is intended to be a way to organize onboarding, in case someone is granted access to the SIMS Slack (which is the main barrier to registration) but hasn’t been properly oriented to the network or the Portal.
Access Open Reviews
When SIMS Remote Coordinators are supporting an operation, they have the ability to create “Reviews”—learning records to help us improve our knowledge management, guides, and standard operating procedures. New review records are placed into a queue awaiting processing by administrators. To process open reviews, click on the record, log what the administration team’s reaction to the feedback is, and then click Process Review Record. Ideally, this processing would be done as a group and in conjunction with a SIMS learning focal point.
Edit Skills List
Users can tag skills they possess to help the network find support on specific tasks. That list of skills will evolve over time, and so they have the ability to add new items. Name the skill and select the section to organize it under. If you need to delete a skill, please reach out to the Portal developer, as making changes to records when users already have the skill assigned can cause unexpected behavior.
Upload New Badges
As the network continues to use the Portal, new ideas will emerge around badges that we could include. The new badge creation process is documented here. Once it has been created, use this form to upload it into the system.
Manual Refreshes
The SIMS Portal has a number of functions that run automatically, including badge assignments, cron jobs, and more. If a certain function doesn’t seem to have run, or you want to run it again before its next scheduled run, you can do so through a special admin page. Navigate to the admin portal, scroll to the bottom of the page, and click Manual Refresh. This page has two sets of buttons: badge refreshes and scheduled tasks.
Note that if you run one of the scheduled tasks manually, such as the surge alert refresh function, it may take a moment to complete. Do not navigate away from the page until you get either a red error alert or a green confirmation.
Access the Admin Backend
Navigate to the backend by going to Admin Portal in the ribbon, then scroll to the bottom of the page and click Admin Backend. Many of the functions listed under the Admin Portal are designed to capture common admin changes. But the Admin Backend grants direct access to tables in the database for making changes.
Editing Table Data
The main tables in the database can all be directly edited in the backend through a simple interface. Select the table you want to edit from the top to expand it, then click the pencil icon to edit a row.
Rows may reference objects from other tables. For example, the User record has linkages to many other tables, including Assignments. When such a connection exists, the linked record will appear as a Python object that puts all of the associated data inside a tuple. If you want to edit the data in the linked row, navigate to that table to make the changes. If you want to delete the record—the associated assignment in the example screenshot below—click the X next to it then scroll to the bottom of the page and hit Save.

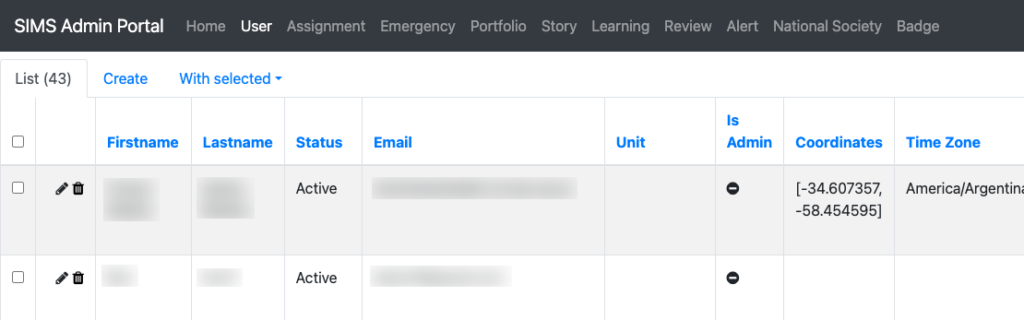
Granting Admin Access
We try to limit the number of people with admin access to enhance security and reduce human error. If we need to add another admin, it can be done through the admin backend.
- Navigate to the backend by going to Admin Portal in the ribbon, then scroll to the bottom of the page and click Admin Backend.
- In the navigation bar at the top of the screen, click User.
- Find the relevant user, then click the pencil icon to edit the record.
- Scroll down to the field labeled Is Admin and check the box.
- Click Save.
Linking Products to Walkthroughs
When a guide is published on learn-sims.org that needs to be associated with a product in the SIMS Portal’s portfolio, it needs to be linked in the backend. To do so, first get the ID of the help article by viewing it in the editor and selecting it from the URL. For example: https://learn-sims.org/wp-admin/post.php?post=84&action=edit – the ID is 84.
Next, open up the admin backend and select the Portfolio table. Find the product, and enter the ID under Km Article Id. Reload the portfolio page and you should see a link appear to the article.
Direct Database Access
Database software allows users to connect directly and perform SQL queries to read, write, edit, and delete data. As an additional layer of security, administrators that want direct access to the database must register their IP address with the Portal’s developer so that it can be added to a whitelist. This was configured so that a stolen password alone wouldn’t grant an attacker access to our data.
To grant an IP address access:
- Log into AWS as an authorized member of the account that hosts the Portal
- Navigate to Amazon RDS—Relational Database Service—and click Databases from the left pane
- Click on the DB Identifier for the database, which is called
simsportaldb - Under Connectivity and Security, find the label for VPC Security Groups and click the link for the security group’s ID (should be a random string of characters)
- On the Security Groups page, look for the section labeled Inbound Rules and click Edit Inbound Rules
- Click Add Rule and set:
- Type: PostgreSQL
- Protocol: TCP
- Port Range: 5432
- Source: Custom
- IP Address (the text box with a magnifying glass icon): Enter your home or office IP address. You can Google What is my IP address to get this string.
- Description: Name it so it’s clear who this access is for.
- Save the rules.
It’s a good idea to periodically audit this list, as each additional user opens up an additional vector of attack for a bad actor.