Beginning in 2024 after a change to the Trello terms of service which limited the number of free users per board, SIMS began using GitHub projects to manage tasks. Though it involves a bit of a learning curve for people used to working with Trello, the core concept of having a Kanban board to organize tasks by status remains the same. This guide walks you through how to set up a new board and connect it with the Portal.

Create the emergency in the Portal
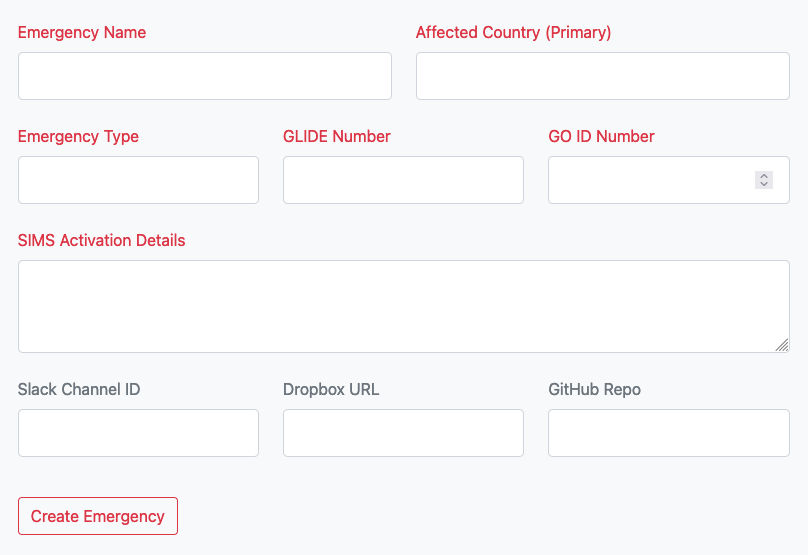
Only SIMS Portal admins can create new emergency records. When creating a new record, you have the option of adding information about the supporting tools we use (Slack, Dropbox, and GitHub). None of these are required fields—and Slack channels are now automatically created anyway—so it is recommended you first create this record before creating the repo, then come back to update it later.
Create the repo on GitHub
The first round SIMS Remote Coordinator or a SIMS Portal admin can now create the repository (“repo”) that will manage tasks on GitHub. Normally used for storing and collaborating on code, a repo in this case is only being used as the tool to manage tasks in the form of “issues” (which are analogous to cards on Trello).

- Open the SIMS organization page on GitHub.
- Click New Repository.
- Name the repo the same thing as the Slack channel (but with dashes instead of underscores): YYYY-iso3-emergency. For example, 2024-bra-floods.
- Mark the repo as public. This is required to allow the SIMS Portal to push and pull data.
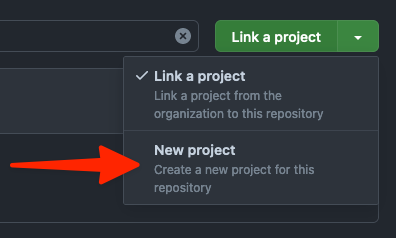
- With the repo created, you should see a navigation link at the top of the page that says Projects. Click the arrow next to Link a Project and select New Project, then click the button.
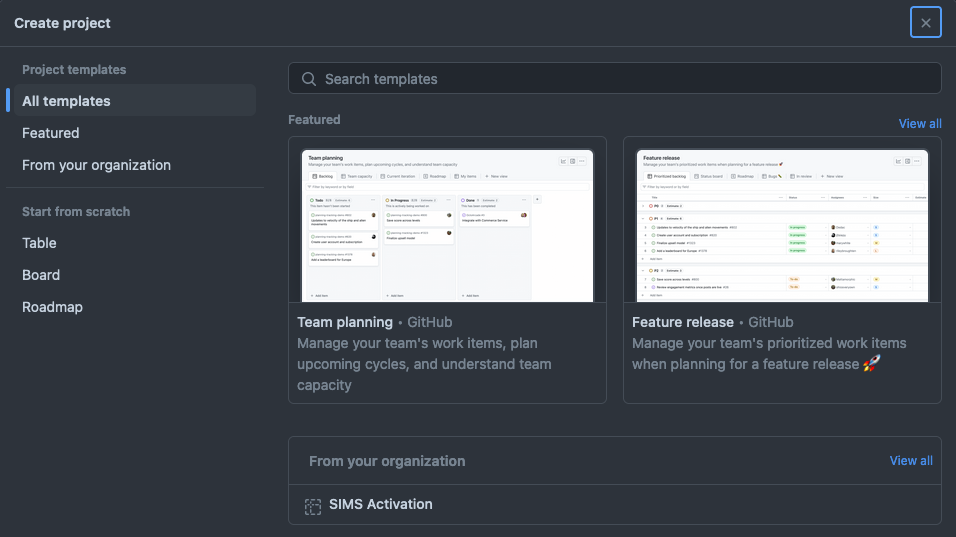
- On the next page, you should see a number of options for getting started. Under Templates, select SIMS Activation. This template includes the standard columns we use during an activation.

Adding new issues
Issues are where the SIMS Remote Coordinator will describe the requested IM product or service, and manage communication about it with the assigned remote supporter. To create a new task, click on + Add Item at the bottom of the relevant column and start typing the name of the request. Hit Enter to save it and then click on the newly created card.
- All issues start as drafts. Leaving the issue in draft form prevents it from being visible in the SIMS Portal. Once you’re ready, click Convert to issue to make it go live. In the dropdown, you will see other repositories to choose from—be sure to select the repo for this particular response.
- Update the description. It is recommended that you use a standard template for tasking that clearly articulates the ask. Here’s an example of that template in use:
- What: A simple map of Brazilian RC locations.
- Outcome: Basic map showing the name, location, and other basic information about the branches of Brazilian Red Cross.
- Format: A0 for printing and a digital copy for sharing.
- Priority: Low
- Deadline: Monday, May 27
- Link on GitHub: View issue
- Data Source: D02 in operational Dropbox
- Add the relevant labels to the issue using the predefined list.
- Set a due date using the date field under the label section.
- Copy and paste this bulleted list to the relevant Slack channel for the operation. Here’s an example of what that might look like (requires SIMS Slack access).
- Once the task has been picked up, add the assignee’s GitHub name. At the time of the drafting of this guide, GitHub is limiting the number of people that can be assigned an issue on free accounts like ours, so assign the task to the person primarily responsible for delivering the product if there are multiple collaborators.
Managing issues
As the task is worked on, the assigned SIMS member may have questions or request feedback. This should all be done on the issue using the comments. Share links, drafts, and more here.
When the status of the task has changed—say, a draft has been shared with the field and is awaiting their feedback—the SIMS Remote Coordinator should move the issue to the relevant column.
When the task has been finished and the issue moved to the Done column, be sure to use the Close Issue button at the bottom of the page.

1 Comment